Published February 7, 2022 01:00AM
Originally posted onRock and Ice Magazine
DIY: How to Build A Crack Machine
Instructions on how to build a home crack training system for all your crack climbing training needs.
NOTE: These instructions are for a simple crack machine that can be built in a weekend with minimal construction skills. Anyone with basic framing experience will have no problem. There are other, more complex ways to build a crack machine but this guide is will get you started.
As a climber from the flatlands of Oklahoma, I had to get creative. I lived hours away from any decent climbing and when my buddies and I planned our first trip to Indian Creek, Utah, we had one small problem—not one of us had much experience climbing cracks or placing pro. We were determined to get after it, regardless.
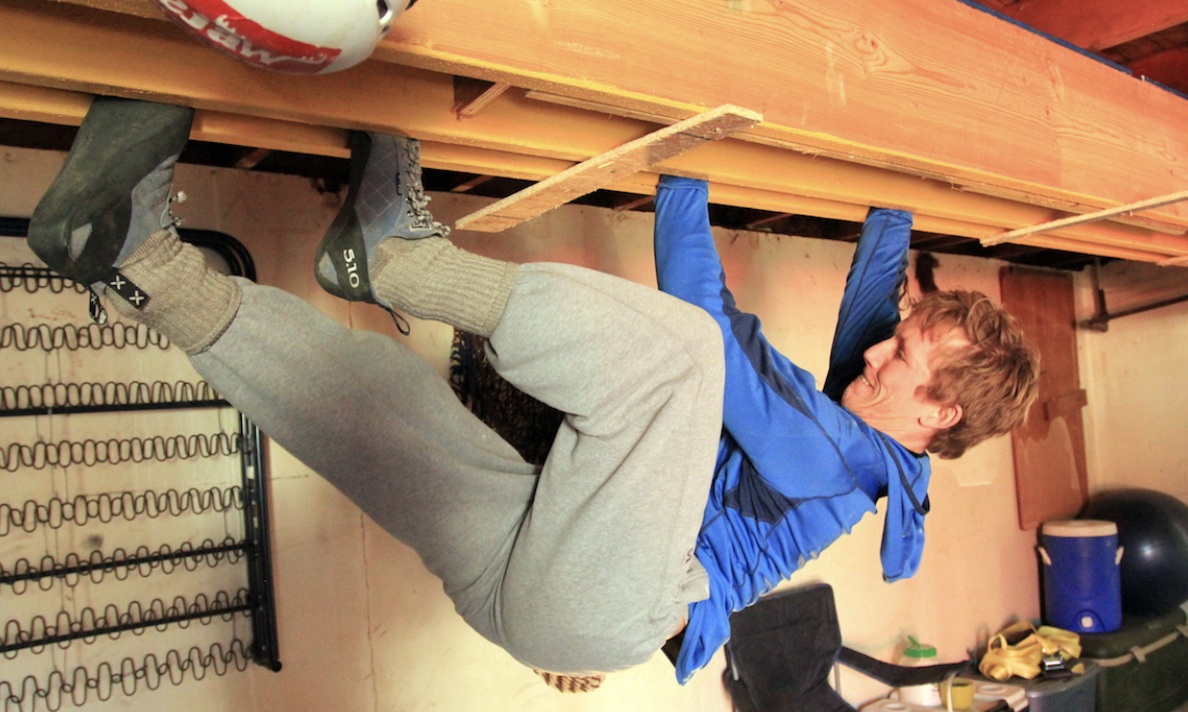
After a trip to the local hardware store, and a few days of painting and construction, we were running laps in the garage beneath my climbing partner Bart’s studio apartment. The configuration featured two roof cracks: perfect hands and an offwidth. In the weeks leading up to our trip, we spent countless hours jamming the hand crack and flailing in the offwidth.
Unlike a home bouldering wall, a crack machine takes up little space, is easy to build, and cost a fraction of the price.
ADVERTISEMENT
For anyone who loves or wants to get into crack climbing but doesn’t live near any splitters, or wants to become a crack master, here’s a quick guide on how to build a home crack machine, or system if you build more than one:
DESIGN
Before you start building your crack machine, here are things to consider:
How to Support Your Crack System

There are many ways to hang a crack machine and you will have to design a way that works best for your situation. The easiest place to install a crack is in an unfinished garage or basement where you can attach to readily exposed beams, or to an existing structure.
A tip from the Metolius How to Build a Home Climbing Wall guide says: “Attaching your [system] to an existing structure will eliminate some support braces, and be easier to design and construct, but will lock you into that location. The existing structure becomes part of your design. You must also ensure that the existing structure is strong enough to support the additional stresses the bouldering wall will add to it.”
If you’re renting a place and can’t ding up the walls, or can’t dig your roots in deep to a single location, a freestanding machiine will do the trick and allow you to move later on. With a little more material, money and effort, you can construct a freestanding crack system.
ADVERTISEMENT
Remember: Wood and people are heavy. Whatever your design, it needs to be structurally sound and safe. Have your plans on how you’ll support the crack system dialed BEFORE you begin building.
Crack Width
What width you want your crack will depend on your hand size and the style of crack climbing you are training for. Generally Fingers are .5”-1.35”, Hands 1.35”-2.5”, Fists 2.5”-3.75”, and Off-width 3.75”-12”.
For the first-time crack builder or newer crack climber, start with a parallel hand-size crack or a varied crack that ranges from small to cupped hands. If you can’t decide or like your options, take the challenge of building an adjustable-width crack system.
Reinforce Sidewalls
It doesn’t matter whether you’re building an offwidth or finger crack, the walls of the crack need to be rigid. The slightest amount of bowing in the wood will make jams difficult—near impossible. Placing blocks of wood every few feet between the crack sidewalls takes the flex out. Block spacers also allow variable widths and flair to be created between the sidewalls.
ADVERTISEMENT
Parallel, Variable, or Flared

Parallel: Parallel-sided cracks are the easiest to build and are great for running laps for endurance training. More advanced climbers, however, may prefer a crack that has variable widths or flair.
Variable Width: Crack width can be changed by using different size spacers between the sidewalls. But remember, wood will only flex so much. When using two long boards for sidewalls, you can’t go right from tight fingers to off-width. Think gradual V-shape, done by systematically increasing the width of each spacer. It’s possible to start tight, get wider and return to tight, or vice versa. Get creative.
Flared: Flared cracks are a bit more complicated to build, but can be the ultimate training device for the experienced crack climber. To flare your crack, use wedged-shaped spacers, set to the angle you desire.
Variable Angles: For an extra challenge, both construction-wise and climbing, you can build the crack in different sections with each section set to a unique angle, say, a 45-degree crack into a roof crack. These angles can be fixed (easier to build) or made adjustable by using hinges in the crack sidewalls. Hinges will allow you to change up the angles for each section depending on the project you’re training for or what you’re feeling like.
ADVERTISEMENT
Textured or Bare
Natural wood won’t tear your hands up and can be climbed without tape, but it can be slippery. Adding textured paint to your crack leads to a rougher ride, but is closer to the real thing. Add texture by mixing sand into a latex paint and applying multiple coats. Use finer sand and thin coats, as it tends to hold up better.
Adjustable cracks can be more work than they are worth
Building multiple cracks will take more space and material, but they require a whole lot less engineering and allow you to change between sizes without having to stop and adjust.
ADVERTISEMENT
With that said, you can use threaded rods, nuts and washers instead of fixed wooden spacers to create an adjustable-width crack machine. It’s also possible to hinge the crack sidewalls to allow adjustable angles.
Decide what’s best for you in terms of your available space and carpentry skills.
Tools and Materials
What it takes to build a basic crack system:
Materials
— 2×12 (~$24 each), for crack sidewalls. 2×10 and even 2×8 will work as well.
—2×4 (~$4 each), for spacing blocks and end caps.
—One box of 3” wood screws (~$25, 1-pound box).
—Frame connectors, to mount crack system, if necessary.
—Paint & Sand (optional) (~ $15, 1 gallon latex paint).
—Carriage bolts/washers/nuts for mounting, or for hinges/adjustable angle cracks (optional).
—Threaded rods/washers/nuts (optional), for adjustable width cracks.
Note: Nominal wood dimensions are not their actual dimensions. A “2×4” is actually 1½” x 3½”. Use softwood like pine if you’re making a variable-width crack, since it’s more flexible than hardwood and can be bowed between different size block spacers.
ADVERTISEMENT
Tools
—Power drill
—Skill saw or handsaw
—Tape measure
—Hammer
—Sand paper or sanding block
—Clamps (optional)
ADVERTISEMENT
—Miter saw (optional)
—Paint brush (if painting)
—Wrench (if placing bolts)
The Build
. Photo: Anthony Johnson.")
Once you have a design and materials, you’re ready to get building! Depending on the complexity of your system, available tools, and your carpentry skills, the construction process can take anywhere from an afternoon to a multi-weekend project.
These instructions are for a simple crack system that can be built with minimal construction skills. There are other, more complex, ways to build a crack. This basic guide is just to get you started.
First, cut the 2×12 boards (crack sidewalls) to desired length(s). Remember to sand edges and faces afterwards to get rid of the pokies—nothing worse than a fat splinter when you’re jamming.
ADVERTISEMENT
If you’re adding texture, do this before you build—it’s easier to paint boards beforehand. Lay out the 2×12 boards in a well-ventilated area and apply 2-3 coats of pre-mixed latex paint and sand. While the paint is drying you can move on to the next step.
Cut the 2×4 (or leftover 2×12 sidewall) spacers into the appropriate size blocks or wedges. Generally, Fingers are .5”-1.35”, Hands 1.35”-2.5”, Fists 2.5”-3.75”, and Off-width 3.75”-12”. Spacers can be placed either horizontally or vertically, depending on the width you’re aiming for. Align spacers in a way that saves the most time (i.e. cutting) and material.
If you’re going for a parallel crack, cut each block the same size. For a variable-width crack, each block will need to be cut slightly larger than the last so the crack will gradually change across the length of the system. Additionally, if you’re adding flair to the crack, cut the blocks into wedges to adjust for your desired amount of flair.
ADVERTISEMENT
To assemble the crack, lay the sidewalls side-by-side and place your spacer blocks approximately every four feet. Use clamps (if you have them) to hold it all together while installing wood screws (from the outside of the sidewalls into spacer blocks). Don’t miss, screws are sharp. Once you have the crack system assembled it is ready to be mounted.
Mounting Your Crack Machine

Mounting, or installing, your crack system can be a beast of its own, depending on your space. But you were smart and planned ahead for this when you crafted up a design. If you have exposed beams or found where your studs are, mounting the crack can be simple as carriage bolting, using frame connectors or screwing the crack to the main frame.
Here’s some advice from the construction page of How to Build a Home Climbing Wall:
“The framework of the [crack system] can be attached to the support structure in a variety of ways, depending upon the design of your wall and the configuration of your support structure. Whatever method you choose, it must be absolutely bombproof. Consult an engineer to be certain that whatever structure the [crack] is attached to is sufficient to carry the loads that will be imposed upon it and that your attachment method is correct for your application.”
You can find a various frame connectors, such as joist hangers, plates, and corner braces, at your local hardware store.
ADVERTISEMENT
Freestanding structures are more complicated but are ideal for anyone who is renting or moves frequently. These are beyond the scope of this article on basic crack systems.
Remember: Wood and people are heavy. When mounting the crack system, make it bomber.
Read All the DIY Articles
Make Hangboarding Harder or Easier
How To Get The Most Out Of Your Crack Machine
How To Build Cheap And Portable Crack Trainers
10 Ways To Repair Your Own Gear
Use Rubber Bands To Increase Safety
Build Your Own Extendable Bouldering Brush
ADVERTISEMENT
Cracks not your thing? Check out How To Build a Home Climbing Wall
Written by Anthony Johnson for Rock and Ice. Johnson knows cracks.