Published February 4, 2022 09:00AM
10 Key Habits to Keep You Safe on the Wall
No matter how experienced you are, gravity never sleeps. Stay safe and stay vigilant with these 10 time-tested tips.
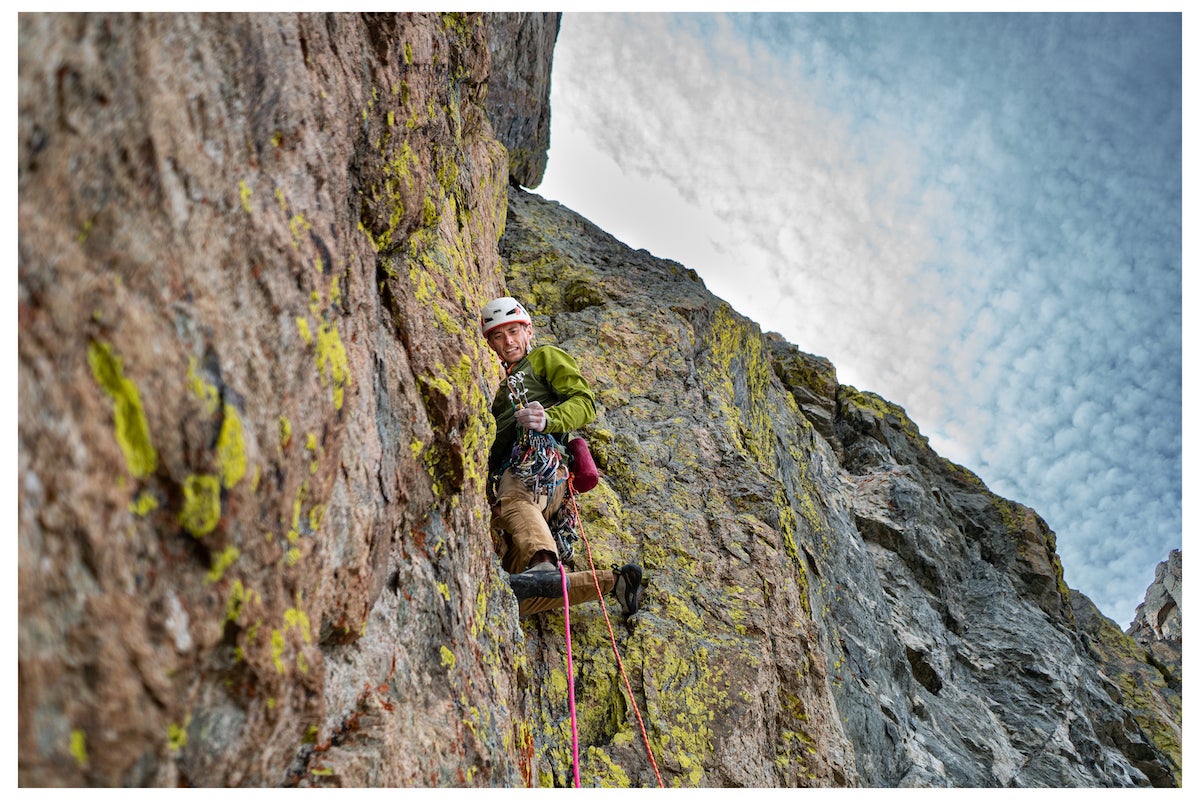
Justin Willis on some gnarly Montana choss. Credit: Kiff Alcocer (Photo: Kiff Alcocer)
Climbing accidents can happen to anyone. Whether you’re a beginner gym climber, seasoned trad-mom, or burly alpinist, it’s important to remember that accidents can happen any time. Over the last decade, climbing has become more popular and, unfortunately, there continue to be accidents, many of which are completely preventable. According to the seasoned Yosemite Climbing Ranger, Jesse McGahey, since 2010, there have been 23 climbing accidents resulting in fatalities in Yosemite alone. Eleven of those accidents happened while rappelling, and six happened to climbers who were not roped up. That means that by simply roping up, double-checking the rappel system, and tying knots in the end of rappel lines, up to 74 percent of these climbing deaths in Yosemite could likely have been avoided.
Of course the vast majority of climbing accidents in Yosemite and elsewhere do not result in fatalities, and often go unreported.
I have been climbing for over 21 years across the globe. I’ve also been guiding in Yosemite and the High Sierra Nevada for almost a decade, and tackled some of the most challenging climbs in the area. In order to keep myself and my clients safe, I have developed these 10 habits and built them into my climbing routine. As an experienced climber, mentor, and guide I have a responsibility to use these habits to keep myself safe and to teach these habits to my clients and students so that they can stay safe when they head out to climb on their own.
Incorporate these habits into your own climbing (if you don’t already) to stay safe in the vertical world.
This article is free. Buy a membership and you’ll receive Climbing in print, plus our annual special edition of Ascent, and unlimited, ad-free access to all our online content.

ADVERTISEMENT
1) Double checks
Checking our knots before we start up is one of the first things we learn as climbers. So why does it suddenly seem “uncool” or in some cases insulting to check your partner’s knot? I always do a safety check with my partner before starting a climb, whether they’ve been climbing for decades or just a few days.
Double checks should include (but are not limited to):
ADVERTISEMENT
–Harness: Fitted correctly and doubled back.
–Knots: If embarking on a multi-pitch route, make sure both climbers are tied in correctly before starting the first pitch.
–Belay device: Set up correctly, with the belay carabiner locked.
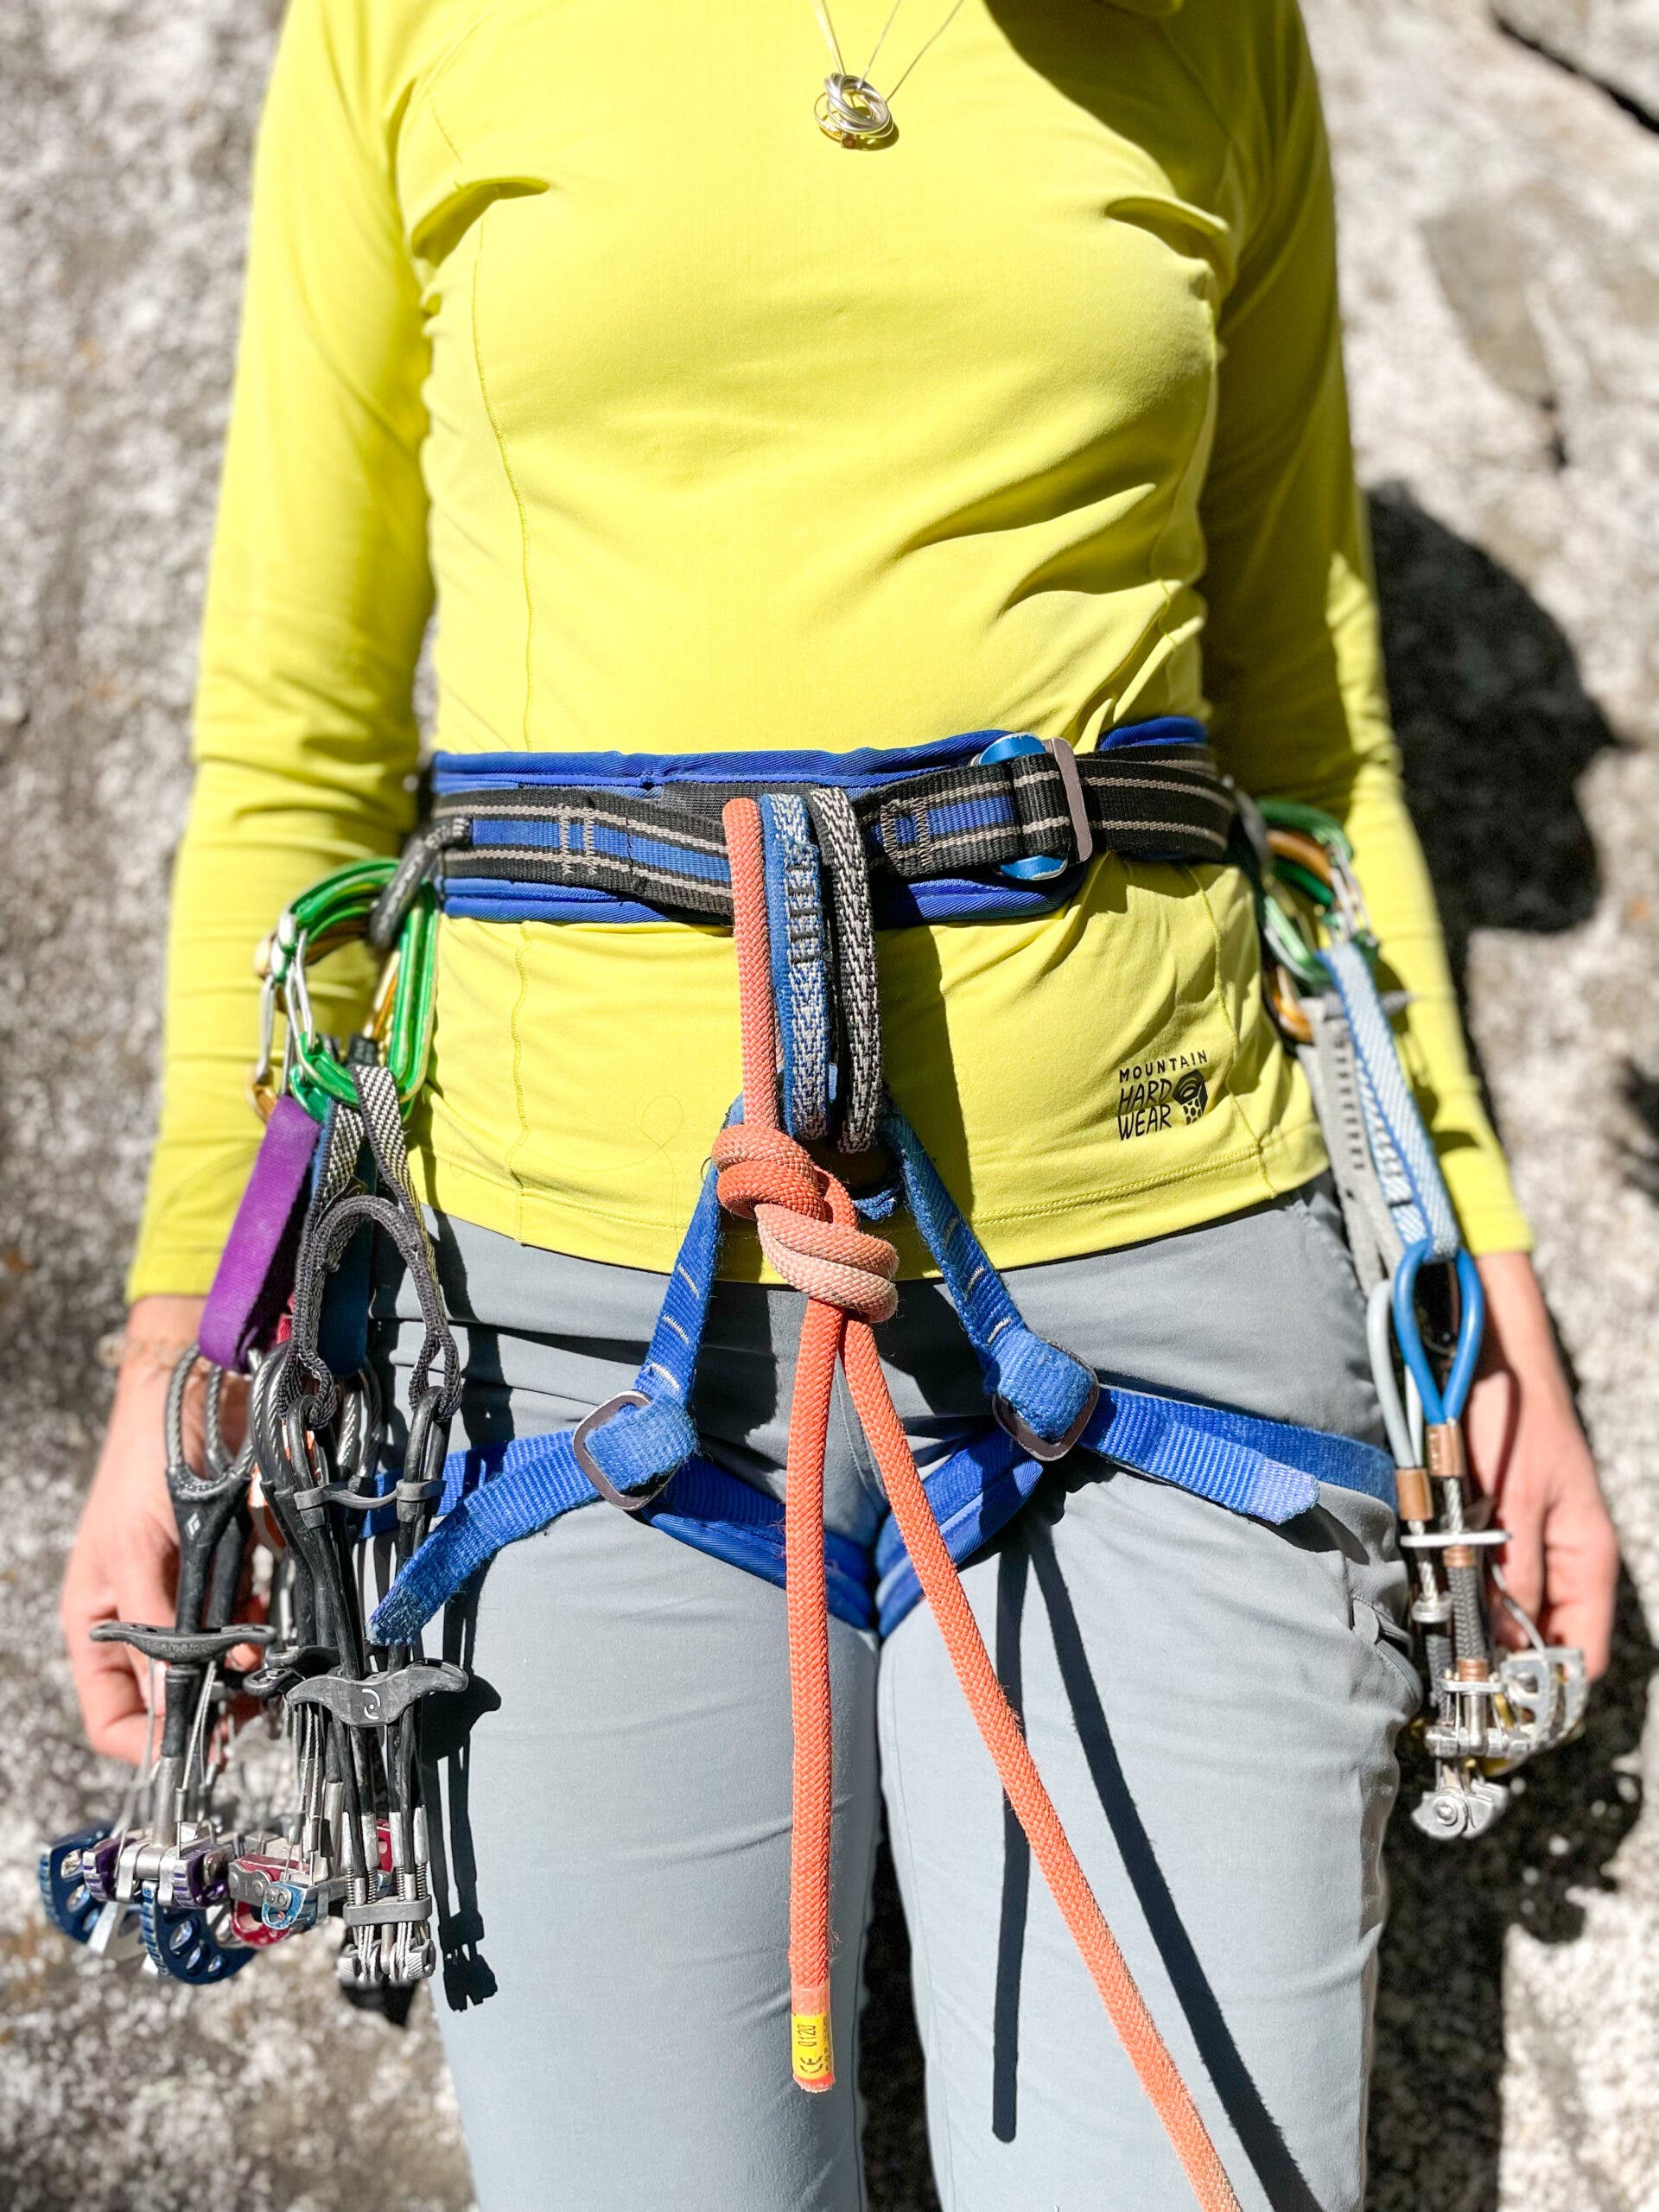
–Gear: Make sure you’ve got the gear you need for the pitch. There have been times when I was so concerned about what gear I would need for a pitch I was about to lead, that I forgot to bring up materials for the anchor. Make sure to double check to make sure you have the gear that you need and also know what to do if you forget it.

ADVERTISEMENT
2) Be aware of your surroundings outdoors
Certain elements make climbing outside more dangerous than climbing in the gym. These include:
–Rockfall: In climbing gyms, we never have to worry about rockfall (although holds have been known to break, and climbers do drop things), but while climbing outside, we are almost always in danger of rockfall. Six of the 23 (26 percent) climbing accidents I mentioned earlier were rockfall-related. Rockfall my seem like a totally objective hazard, but there are a few things you can do to minimize this risk.
Be aware of what’s happening above you, and avoid hanging out directly below climbers at the crag. Find a flat zone that is not directly below a route where you can unpack your bag and rack up. Look for a nice viewing spot away from the cliff to watch your buddies climb while eating lunch.
ADVERTISEMENT
Take your time on lead and research the route ahead of time in order to stay on route. If climbing an ultra-classic, avoid terrain that looks dirty or ultra-chossy.
Consider wearing a helmet if you don’t wear one already.
–Take belaying seriously:
Belay failure accounts for one of the 23 climbing deaths in Yosemite (4 percent).
Climbing gyms have flat belay zones with no terrain to trip on. At the crag, we often find ourselves belaying in rocky and uneven terrain. Ensure you have a good stance while belaying, and avoid belaying too far from the wall. Standing far from the wall could cause you to get pulled violently toward the wall when catching a fall; if the staging area is rocky or uneven, you might even lose your footing and let go of the rope. I try to stand no more than 5-7 feet from the wall. If I’m belaying someone heavy or who is struggling on a climb, I stand next to the wall and sometimes I’ll use one foot braced against the wall.
ADVERTISEMENT
Also remember that topropes in the gym usually have extra friction due to the rope wrapping or even double-wrapping around the anchor bar at the top. Outside, there can be far less friction on a toprope belay, which means the belayer will feel more of the climber’s weight when catching a fall or lowering—and so should be prepared with an active, stable stance.
3) Communicate with your partner before starting up
On a windy day or after a long pitch, verbal communication can be difficult or even impossible. Figure out a plan before starting the pitch and make sure commands are as clear as possible.
–Cleaning an anchor on single-pitch climbs: Talk to your partner before leaving the ground about whether you plan on getting lowered or going off belay and rappelling. Way too many accidents, including deaths, have occurred due to anchor miscommunications.
–Multi-pitch climbs: Discuss what you’ll do if you can’t hear each other after leading a pitch. Some people like non-verbal commands such as three distinct tugs for off belay and then three more distinct tugs for on belay.
I have a standard protocol with my regular climbing partners, in the event that we can’t hear each other. Here’s how we do it:
- The second watches the rope. Once the leader has pulled up the entire rope, the second can take them off belay (they’re tied in, they’ll now serve as the anchor for the leader).
- The second waits one full minute before unclipping from the anchor, breaking it down, and starting to climb. I use this timeframe for consistency: It relies on the leader ensuring their second is on belay within 30 seconds of feeling them at the end of the rope, thus placing their second on belay before they pull in the final bit of slack.
- The second should feel the rope tugging on them periodically, signifying that they are on belay, before unclipping from the anchor.
This protocol is not ideal, and I much prefer to be able to hear my climbing partner. I only do this when climbing with experienced climbing partners. After over two decades of climbing I feel comfortable weighing the risk of unclipping myself from the anchor without being able to hear the leader. But in general, if communication is impossible, it is better to have any plan than no plan at all.
ADVERTISEMENT
–Avoid non-commands: Vague terms like “Safe” or “In direct” are too easily confused for direct commands like “Off belay.” Never take your partner off belay unless they say, “Off belay”! The belayer may need to ask “Are you off belay?” to make sure. If you’re in a crowded area, with other climbing parties nearby, add each other’s names to your belay commands.
4) Anchor tethering on multi-pitch climbs
After leading a pitch, clip into the belay with either an anchor tether, clove hitch, or both, lean back on your anchor to test the system and double check everything before yelling, “Off belay!” Some of the most avoidable accidents on multi-pitch routes happen because of failure to clip in properly.
If you’re using a tether, make sure it’s rated as a personal anchor—for example, the Metolius Personal Anchor System. Some climbers use daisy chains instead, but these are not meant to be used as anchor tethers, and there’s a real risk of catastrophic failure.

5) Clip an “establishment piece”
On multi-pitch climbs, always place protection—a so-called “establishment piece”—off the anchor before starting the next pitch, to avoid a factor 2 fall onto your belayer. The establishment piece can be one of the protection points used to build the anchor—simply clip a draw or carabiner to it and slap the leader’s rope in. The belayer can always unclip this piece after the leader has clipped one or two more pieces above and there is no longer a risk of a factor 2 fall.
ADVERTISEMENT
6) Skills pay the bills
Remember that your climbing skills are your primary way of staying safe when free climbing—the goal, in any case, always being not to fall. We use our hands and feet to stay on the wall, while the gear, rope, and belay are a backup in case we fall. If you are less confident in your climbing skills on a route because of its technical difficulty, place more gear. If you’re confident that your gear will hold it can be safer to say “take” and hang on your gear than to keep climbing and take a lead fall.
The decision of saying “take” or risk taking a fall is yours to make. Don’t feel pressure to listen to others, who aren’t on the sharp end, yelling up at you to “just go for it!” Remember that damaged ego’s take hours to heal while sprained ankles and broken bones can take months.
7) Consider the consequences of gear failure while lead climbing
Not all gear is created equal, and smaller pieces—RPs and micro-cams—are more likely to fail even when placed well. When making difficult moves over thin gear, I often place more than one piece in a row as a backup, knowing that smaller gear is not as strong.
ADVERTISEMENT
If you’re approaching a hard section of climbing, make sure you feel confident in the protection you’ve placed leading up to it. Ask yourself, If my last piece fails, will the piece below it hold? And what about the one below that?
8) Be mindful of terrain
If you’re close to the ground, you’re more likely to take a groundfall. Don’t be afraid to use crashpads and/or a stickclip to prevent a nasty grounder. Meanwhile, big ledges can be just as dangerous as the ground, so place lots of gear and remind your belayer to keep a close eye on you. Avoid falling on low-angle, featured terrain. Oftentimes, it is not safe to fall on terrain that is 5.8 or easier. If you’re a beginner climber, build your strength and skills on toprope before leading low-angle, moderate terrain (see rule No. 6).
9) Close the system
On single-pitch climbs, tie a stopper knot in the end of the rope if you are unsure about the length of the route or rope.
ADVERTISEMENT
On multi-pitch routes, ensure that both climber and belayer are tied into the rope before leaving the ground. Avoid untying your knot until you reach the top of the route.
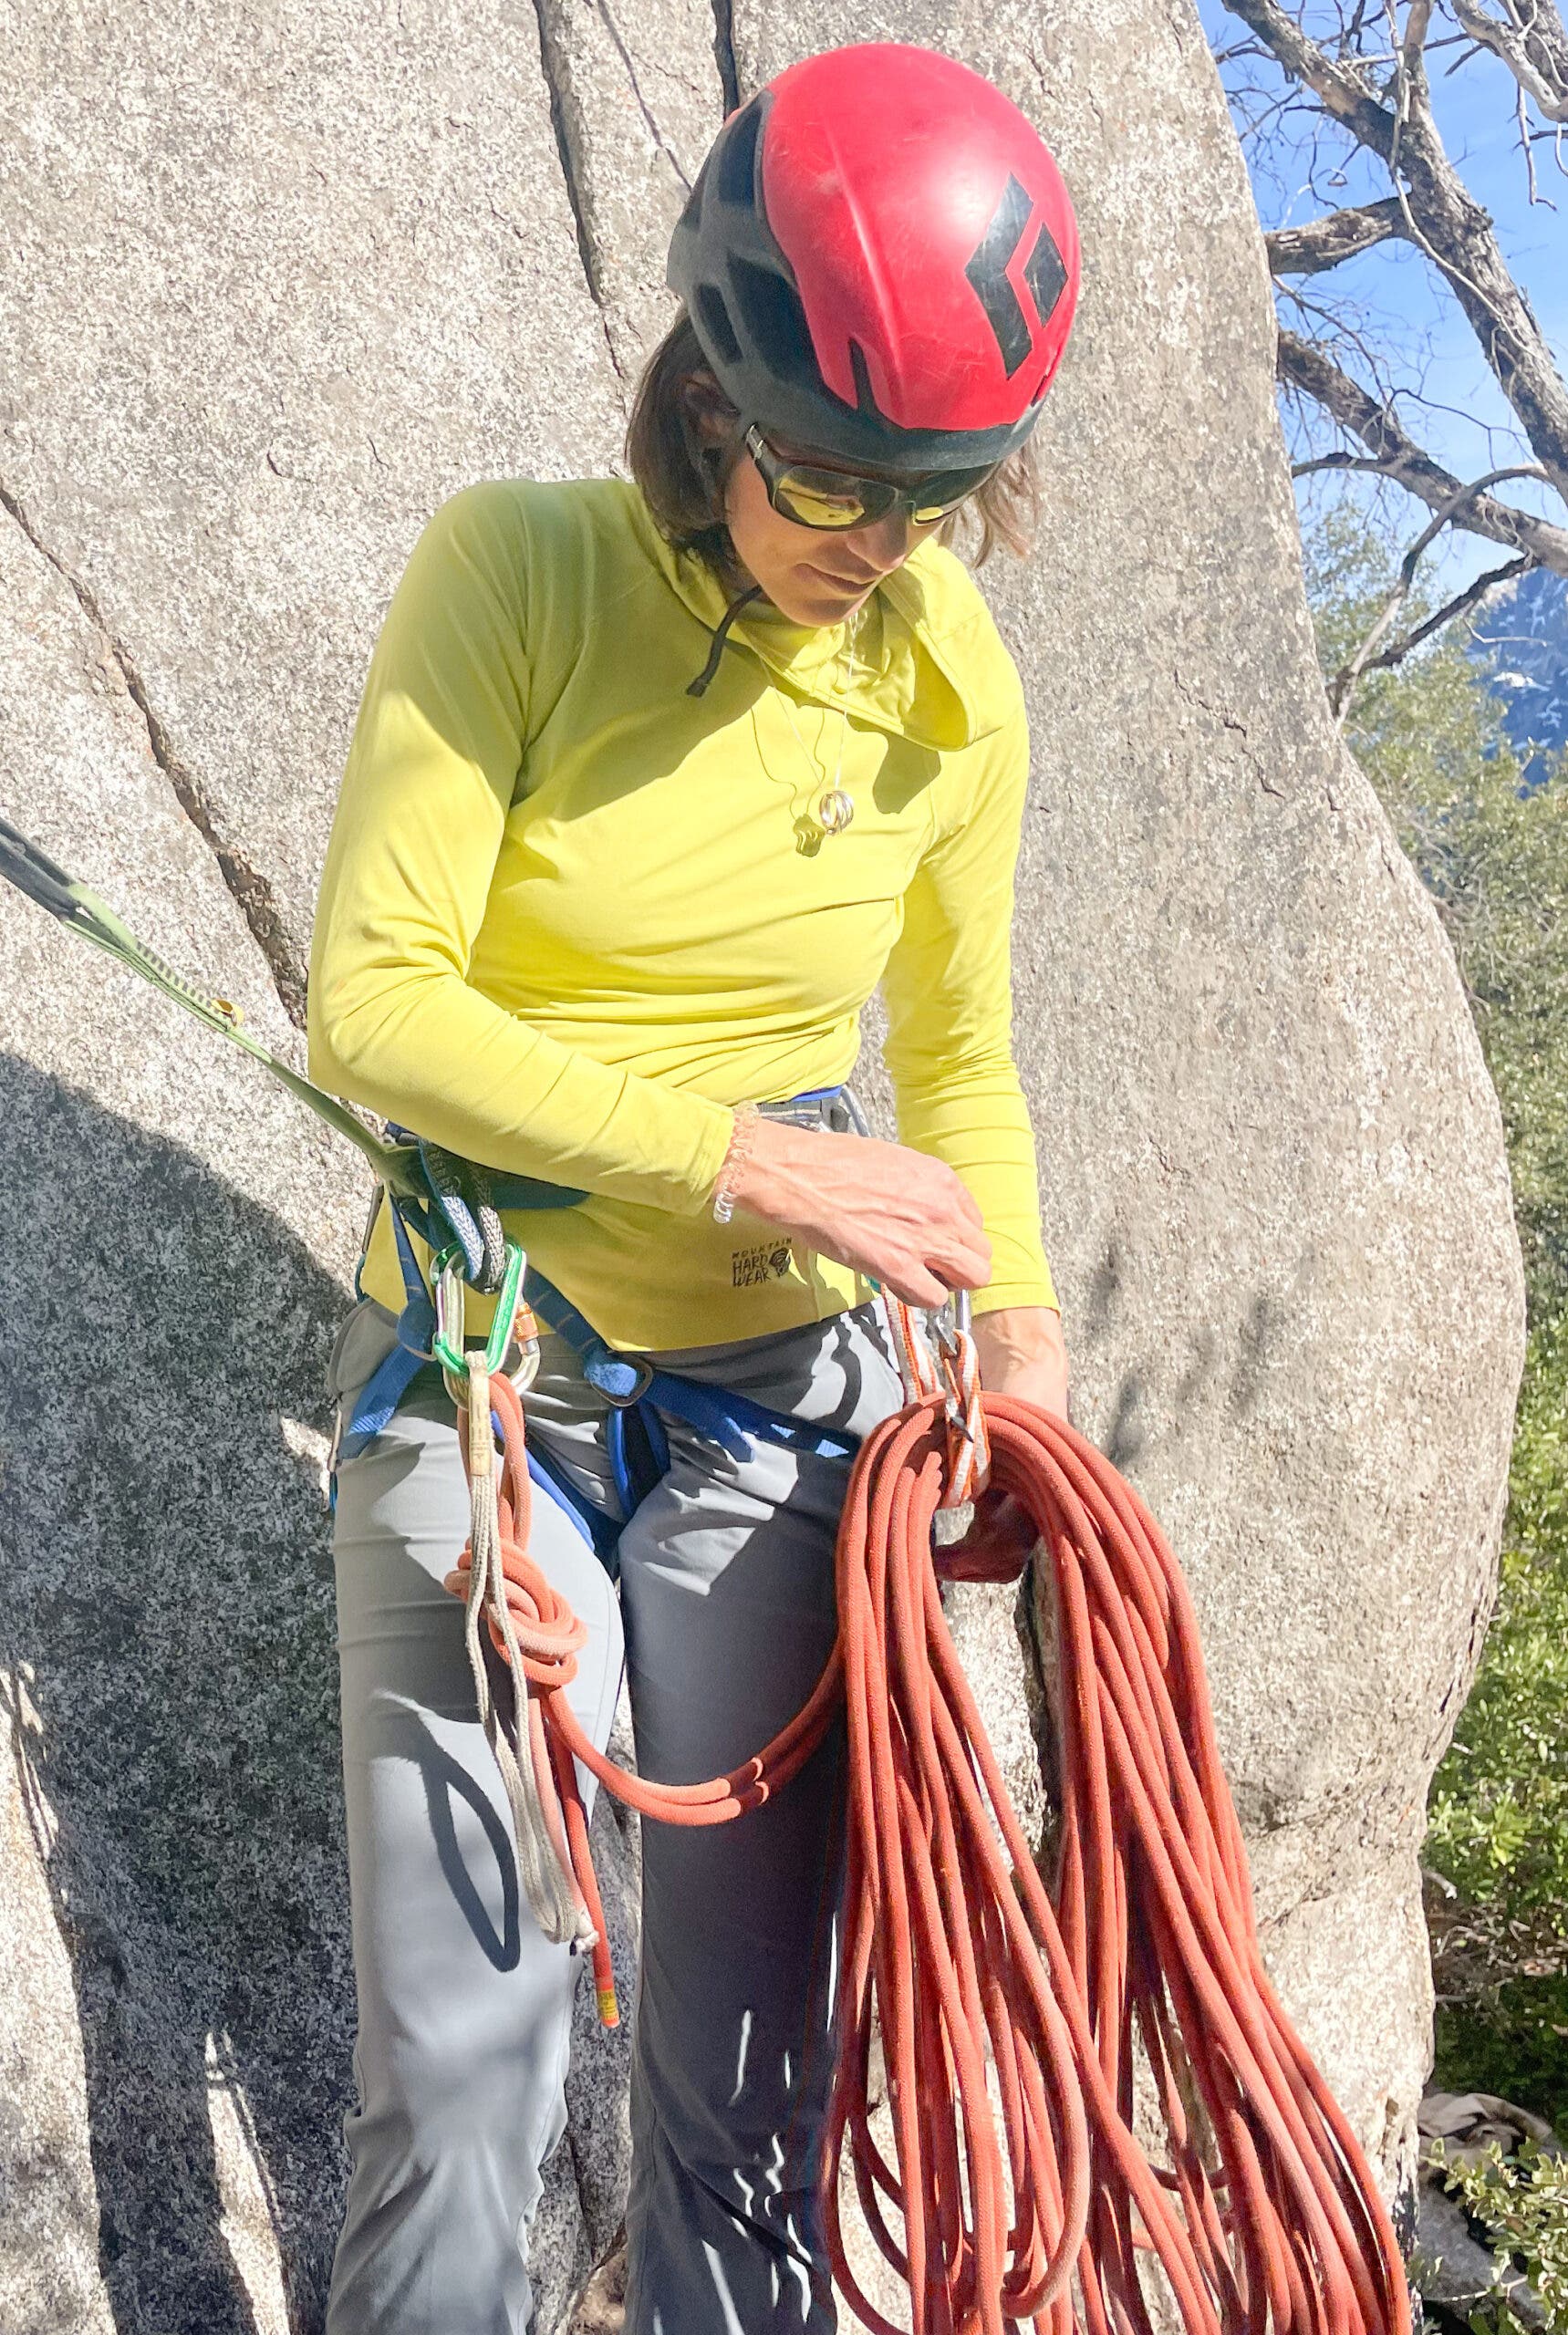
When rappelling, tie knots in both ends of your rope/s. If it’s windy or you’re unsure of the rappel line, tie the two ropes together with an overhand on a bight and clip that to your harness, to keep the ends from snagging or hanging up. If you’re having trouble managing your ropes (wind is a common factor here), coil the ropes into saddlebags and clip them to your harness. To make saddlebags with the rope, start with the ends of the rope and butterfly coil the rope into one hand. You can coil the two ends of the rope together or two separate coils. Use a doubled up shoulder length sling to pass under the stack of coils and clip the sling to your harness. If you keep the coils neat, the rope should feed out from the stacks as you descend.
10) Weight-test your rappel setup before you descend, and use a third hand
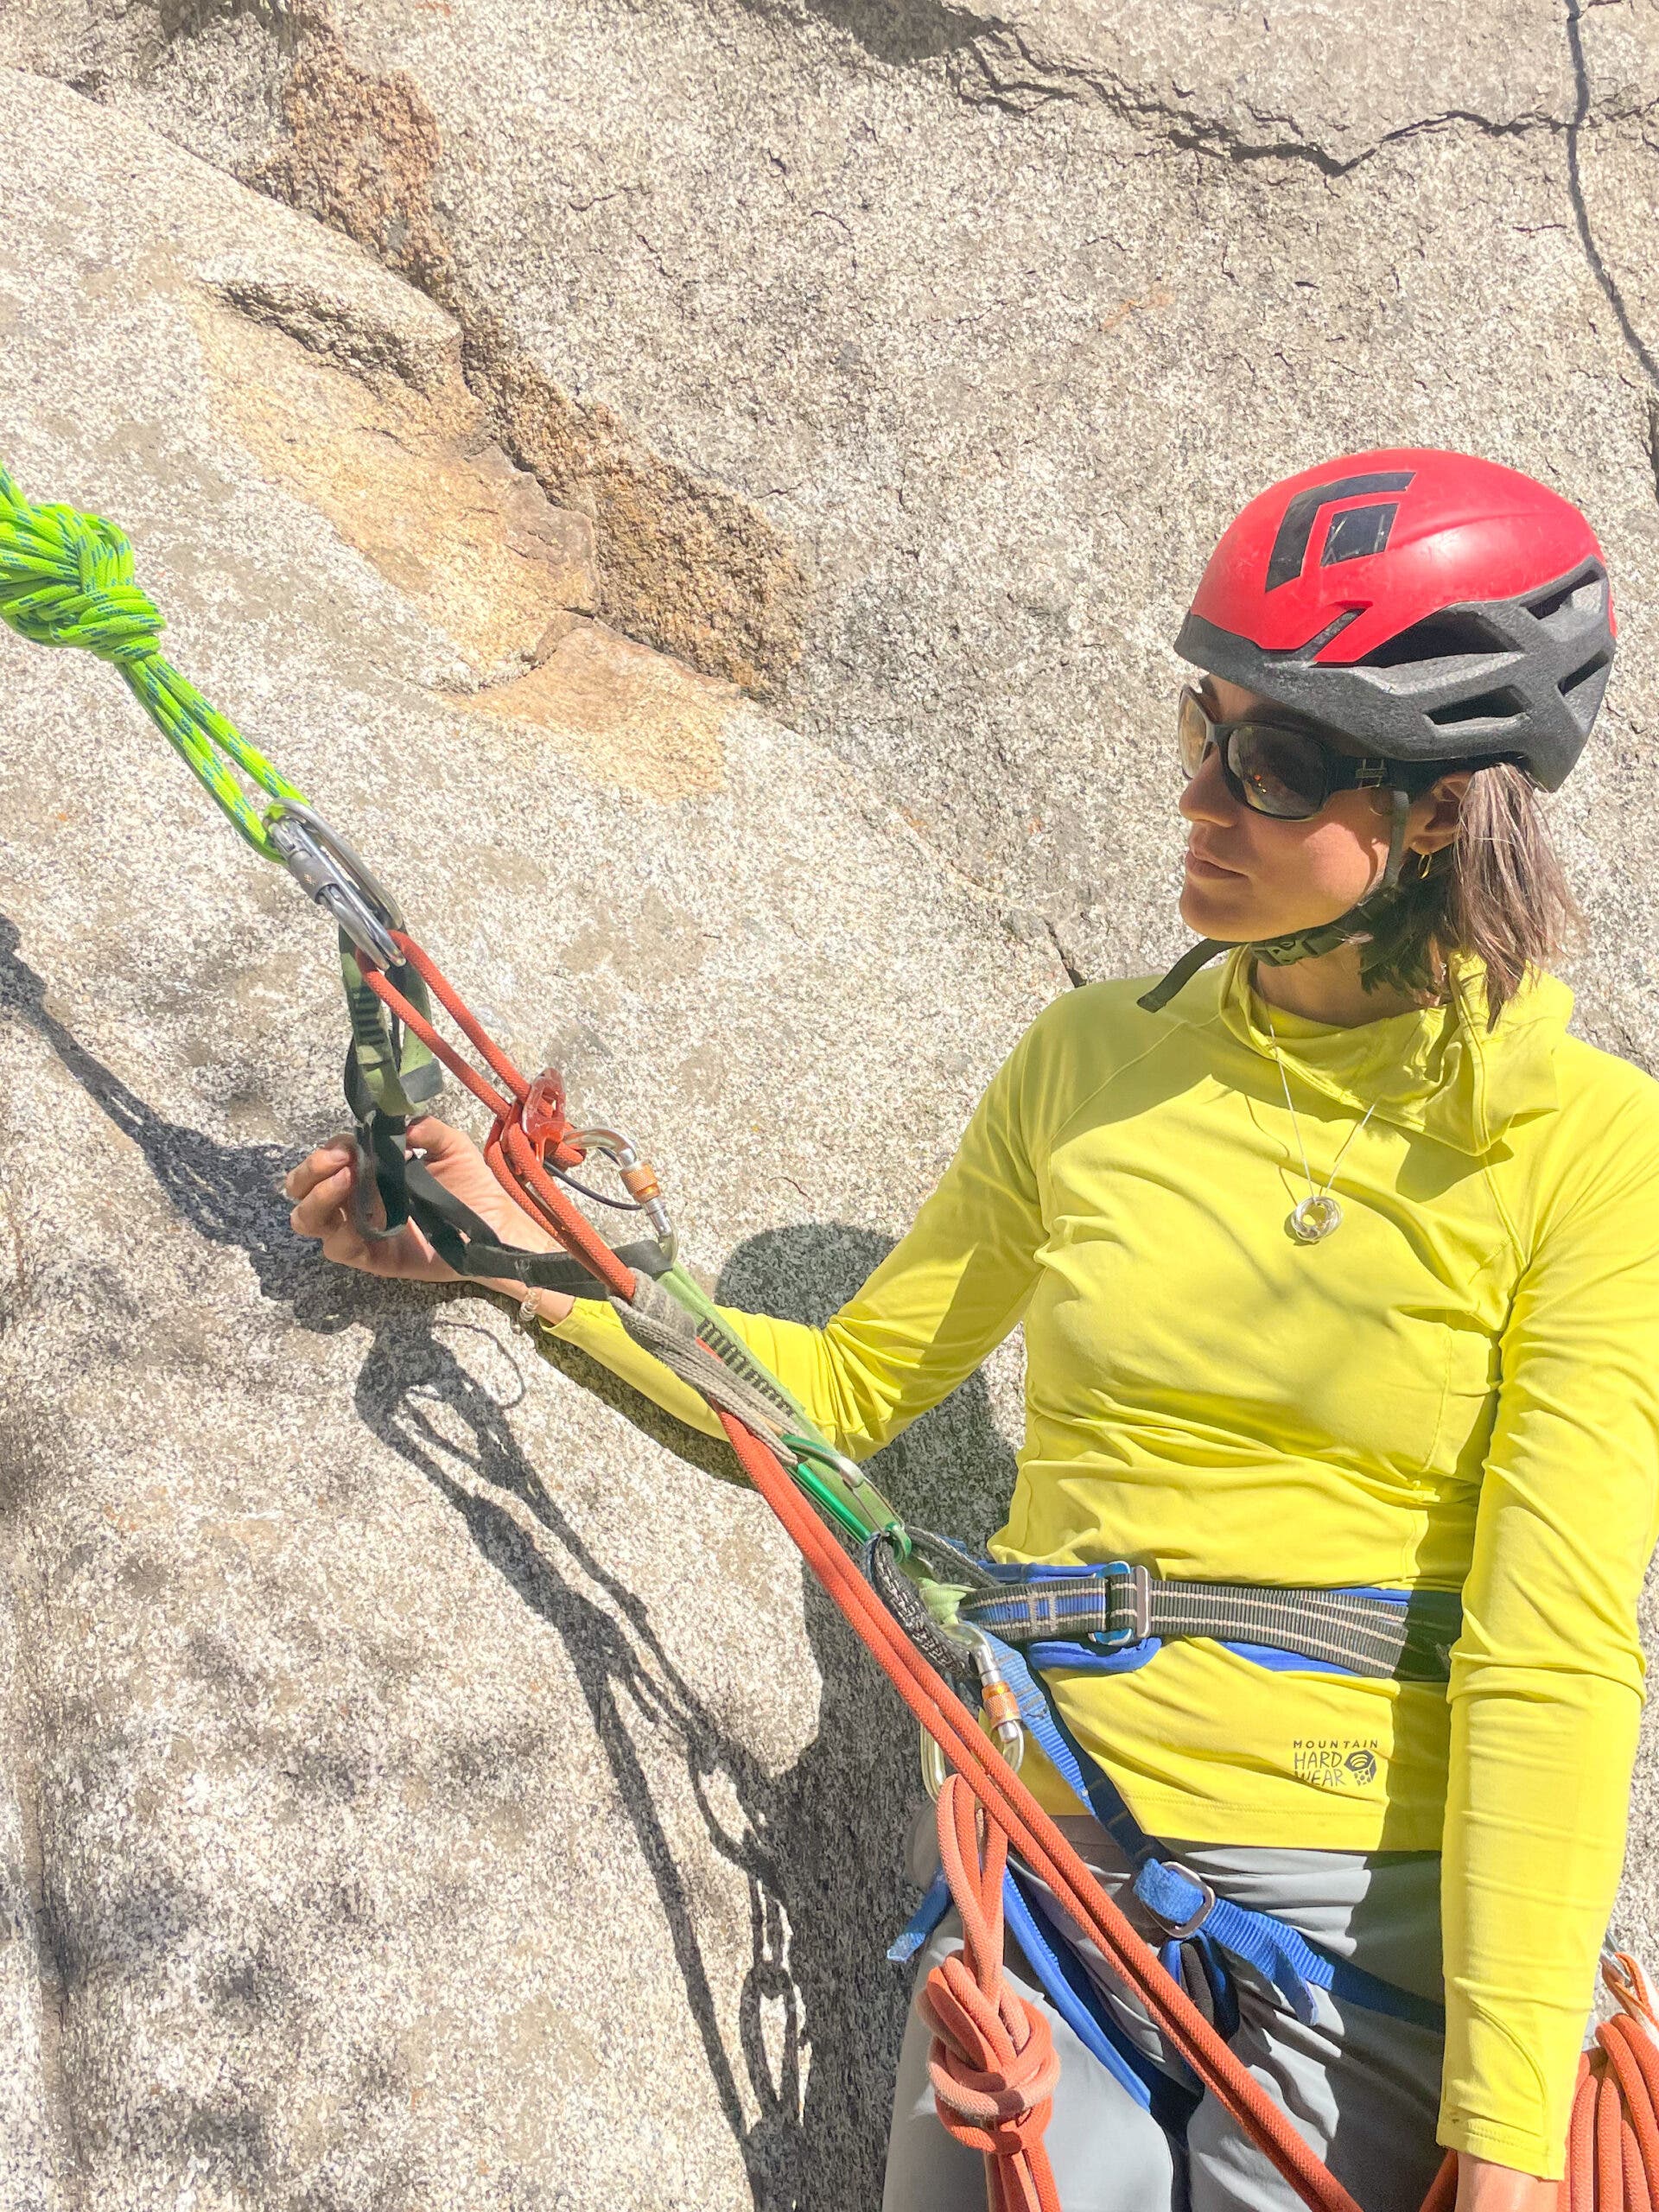
When setting up your rappel, weight-test your rappel setup before unclipping from the anchor. Here’s how:
- Set up your rappel, cinching up the device so that you’re weighting the rap lines and not the anchor.
- Add a “third-hand” friction hitch backup to your rappel system whenever a fireperson’s belay is not possible. I use an auto block or a prusik knot. If rappelling off of my belay loop I’ll clip the friction hitch into my leg loop. If I have extended my rappel I’ll clip the friction hitch into my belay loop. Click here for more on safe rappelling practices.
- Double-check your system and then unclip your anchor tether. This method allows you tophysically and visually inspect your rappel setup before unclipping and gives you slack on your anchor tether, making it easier to unclip from the anchor at a hanging stance.
As climbers, we have a responsibility to stay safe and be respectful stewards of the land. Climbing accidents put rescuers and bystanders at risk and can compromise access to climbing areas. Additionally, climbing rescues can involve a large team of rescuers who can leave a significant trace or environmental impact on climbing areas. Rescuers may need to add bolts or trample vegetation to access someone or descend with a patient.
Following these habits can keep you a little safer while climbing, without slowing you down. Climbing safely also makes us better climbers—accidents can easily force you to take time off from climbing, shorten your climbing career, or end your life. The more we climb the better (and hopefully safer) we become at climbing, so stay safe out there and keep climbing!
ADVERTISEMENT
Miranda Oakley is a certified Rock Guide with the American Mountain Guides Association and an athlete for Mountain Hardwear. She has been climbing since the year 2000. She enjoys all forms of technical rock climbing, but specializes in long traditional routes. She offers advanced climbing classes that help climbers stay safe and tackle their climbing goals.