Updated August 9, 2025 04:47AM
How to Tape Your Hands for Climbing
Crack gloves may be all the rage. But there's still value in knowing how to tape up like a pro.
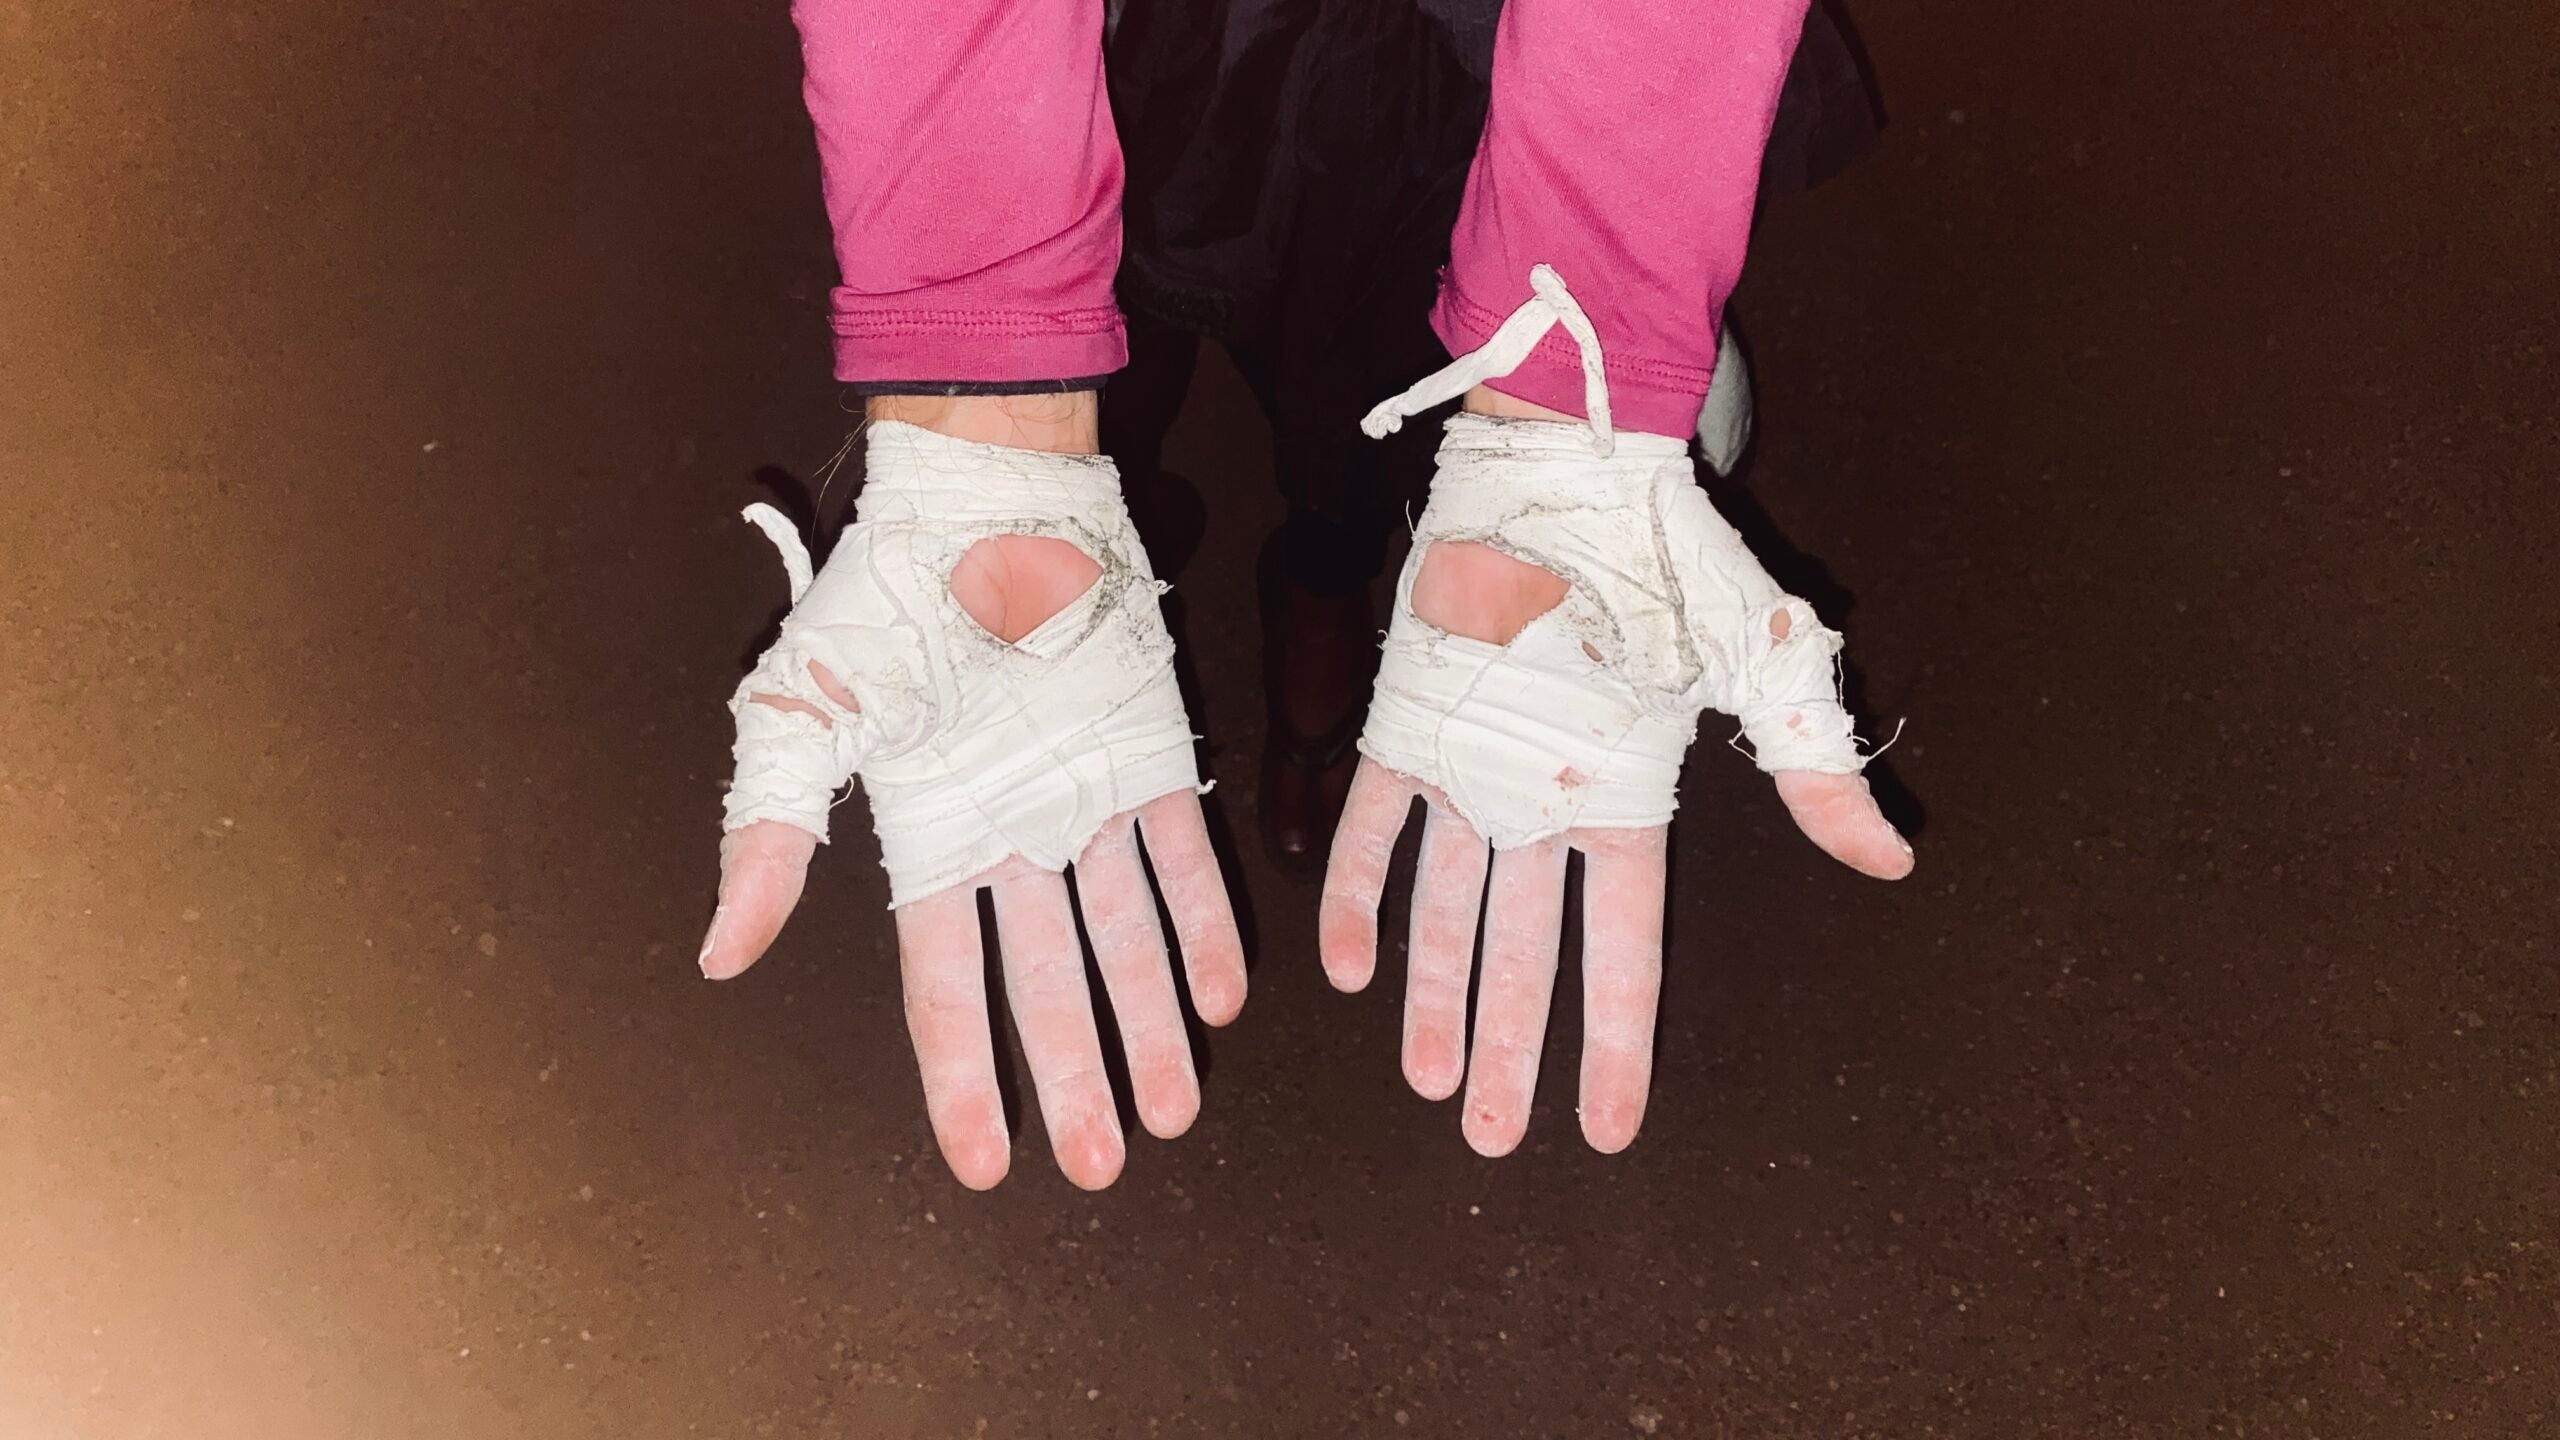
A crack climber holds up her tape gloves, shredded from a full day of use. (Photo: Courtesy of Sam MacIlwaine)
A gnarly fissure will rip the skin off even the best crack climbers. And making a bad tape glove can leave your hands wrecked for days. Learn how to protect your hands so you can keep trying hard until your strength gives out instead of failing from pain or blood loss.
When preparing for a gnarly crack climb, you have a couple considerations to make:
- Crack gloves or tape gloves? These days, nearly every climbing brand makes a version of rubber and leather crack gloves that you can easily slide on and slide off. These are reusable and certainly cheaper (after about 10-20 uses) than making your own gloves out of tape. However, they’re much thicker than the average tape glove. Offwidth climbers will also note that they don’t protect your palms.
- What style of climbing are you doing? If you’re climbing finger cracks, you might not need a full tape glove. But if you’re going palms-down on a 100-foot chimney or hand-fist stacking up a splitter, you’ll definitely want some extra padding to prevent burning gobies in your hands.
- Is there difficult face climbing? Having tape on your palms or fingers can reduce the friction between your skin and the rock, especially on slopers. This usually doesn’t matter if you’re purely crack climbing, but it can affect your multi-pitch strategy. If you’re hand jamming on Pitch 1 and solving a sloper or slab crux on Pitch 2, you’re better off using crack gloves, not tape gloves, so you can easily remove them before the face climbing section.
- How much tape do you have? If you’re limited on tape, you’ll want to use either crack gloves or a reusable taping method instead of something thicker like the boxing glove method.
Still psyched on tape gloves? Here are video tutorials for two different methods that we’ve seen in the wild.
Method #1: Reusable Strips
by Jean-Pierre Ouellet

- I use 1.5-inch-wide athletic tape. Cut two or three pieces of tape the width of your hand, and carefully place them across the back of your hand, perpendicular to your fingers. Make sure the first piece is over the knuckles; this way they’ll be well protected.
- Take a piece of tape that is twice your fingertip-to-wrist length, and wrap it between the thumb and index finger, and then back around the outside of the thumb. Both ends should reach the wrist so this piece will be locked in place when you secure the glove at the wrist.
- Now wrap similar tape strips around the rest of your fingers. To make it easier, here’s my first little trick: After you’ve cut a piece of tape that is twice your fingertip-to-wrist length, make a “bow” with it by squeezing the middle together. Then place the squeezed section between the pinky and ring finger and wrap the piece around the pinky. The two ends should lie across the back and side of your hand, but not cover the palm. Now do the same with your index finger, and then finish with the two middle fingers, as shown. Again, make sure both ends of each piece reach the wrist.
- Cut a piece of tape twice the circumference of your wrist. Wrap this around your wrist so it secures all the other glove parts. Be careful not to make this piece too tight, or you’ll get pumped in an instant when you start climbing.
- If you didn’t trash your gloves too much while climbing, you can reuse them by cutting the wrist tape and then peeling off the glove. Next time you’re crack climbing, thread each finger and your thumb through the appropriate holes in the glove, and then secure it with a fresh piece of tape around the wrist.
ADVERTISEMENT
Additional tips from Ouellet:
- Shave your hands first. It looks really weird, but the tape sticks better to the skin, and when you remove the tape at the end of the day, it won’t hurt. If it’s crucial that the tape doesn’t slip or roll, you can even Super-Glue it to your skin.
- Reuse ‘Em. If you didn’t trash your gloves too much while climbing, you can reuse them by cutting the wrist tape and then peeling off the glove. Next time you’re crack climbing, thread each finger and your thumb through the appropriate holes in the glove, and then secure it with a fresh piece of tape around the wrist.
Reusable Tape Method Tutorial by Genevive Walker
Method #2: The Boxing Glove
If you’re racking up for a burly offwidth or chimney and genuinely concerned about shredding your gloves off, here’s a thicker and more secure glove inspired by boxing glove techniques.
This method covers 100% of your hands, front and back, with at least one layer of tape. It’s not designed to be reusable, but if you’re getting in a lot of mileage, you’ll often find that the tape only lasts one day at a time, anyway. This method is amongst the strongest and most secure, offering minimal opportunity for ripped pieces.
Check out offwidth instructor Sam Foreman’s tutorial below.
An earlier version of this article originally appeared in the magazine in 2012.