Of snowfields and glaciers

"Of snowfields and glaciers"

Safely navigating a whiteout
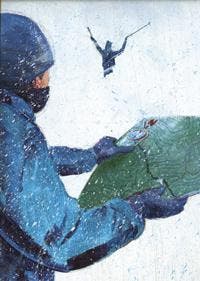
A descent through a whiteout is usually remembered in two ways: over a cold beer with friends or as a bestseller written by the sole survivor.
In fact, descending a snowfield or crossing a glacier in a whiteout can be a complete horrorshow: the ground and the air blur into one, leaving you disoriented, and tracks from your ascent quickly become buried in blowing snow.
Worse yet, the slightest deviation from your route compounds into a potentially life-threatening situation. However, by carrying the proper equipment, taking the right precautions, and learning some simple tricks, you’ll find the trailhead long before mom and dad have to call search and rescue.
To Start…
Never leave for the summit without a map, compass, and altimeter. Familiarity with basic skills, such as adjusting for declination and taking (and setting) bearings, is a must. Do not put all your eggs in the Global Positioning System (GPS) basket, even though these devices can be of great help. Most GPS units are unreliable at extreme temperatures, and no computer can guide you across those ever-shifting icefalls, where the only safe paths weave between crevasses and around volatile seracs.
Base Camp
Before leaving camp, post a handful of bright wands around your tent. If carrying a GPS, set a waypoint here, or — if doing a single-push ascent — at the car or trailhead. Place all navigation gear in an easily accessible, yet waterproof, pocket — for example, a Ziploc’ed bag in the chest pocket of your jacket. There’s nothing worse than searching through a backpack in hurricane-force winds.
Check Your Altitude During the climb, even if the weather is perfect, confirm the altitude at important junctures and set GPS waypoints. Knowing at what altitude you crested, say, a certain ridge on the way up will make exiting the ridge safer, even if later you have no visual reference point.
Know Where You Stand
Regularly check your map during the ascent, so that you always know approximately where you stand — you should be able to trace your route on paper. All too frequently, people pull out the map after the storm has hit, with little idea where they are or what their route looks like.
Trail of Holes
When traveling over a crevasse-ridden glacier, punch holes in the snow with a ski pole every 15 to 30 feet. Site two deep holes right after each other, so they align to point back in the direction from which you came. This may be the only way, short of bringing hundreds of wands, safely to retrace your route. Even in nasty storms, the holes take much longer to fill in than your tracks.
Your Partner, Your Landmark
If you were unable to leave a trail of wands or holes, use the front person on the rope team as an extension of the compass needle. First, using the map and compass, figure out your direction of travel. (Write the appropriate bearings — southeast/140 degrees, say, to make it off a given glacier — on your map before your trip). If poor visibility occludes landmarks, send your partner to the limit of your rope or visual range, and, through waving or shouting, line her up with the bearing. Walk toward her, and then repeat, thus honing the accuracy of your bearing.
Aim Off-Target When using your map to determine a bearing, aim slightly left or right of your target (tent, trailhead, etc.). That way, when you hit the appropriate altitude or landmark feature (road, snowfield, stream, etc.), you’ll immediately know if you need to walk left or right to arrive at your target. If you aim straight for your target and miss it by a few dozen meters, it may be impossible to figure out which way (left or right) you need to travel.
Whiteout survivor Martin Gutmann once lost himself in a tub of French vanilla ice cream… and didn’t resurface for days.