Injury Prevention Quick Tip: Preventing and Strengthening Against Ankle Sprains

"None"
The following is an excerpt from the online course Strength Training for Injury Prevention by Dr. Jared Vagy.
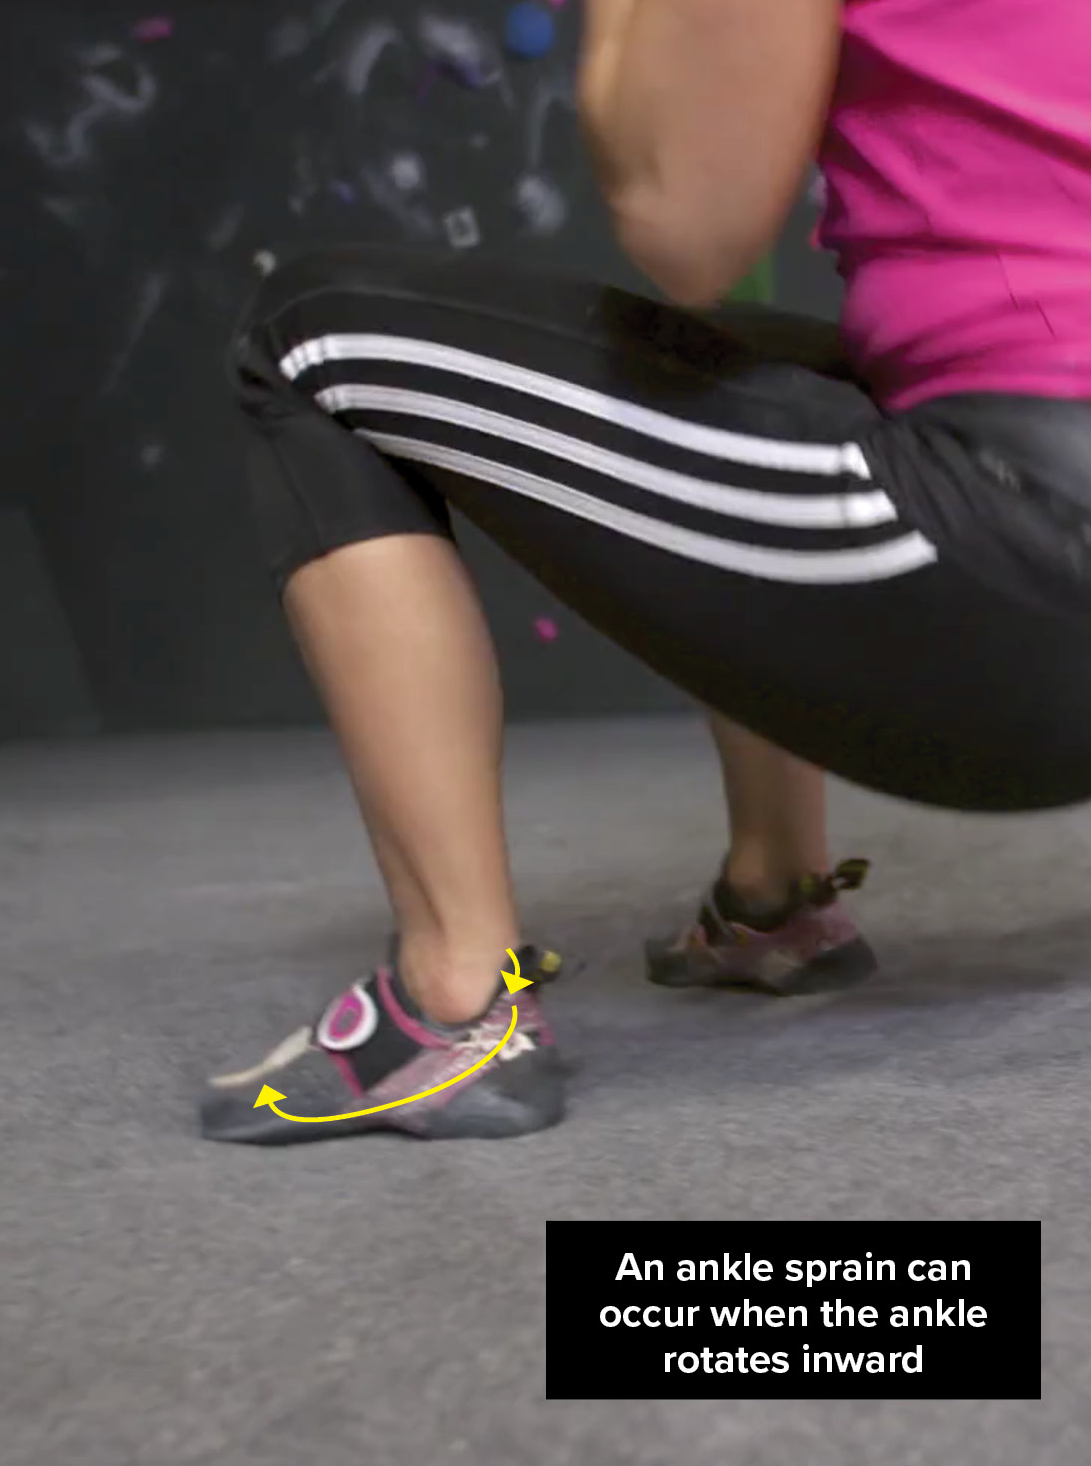
You push past the final move and are poised to send your bouldering project. As you pump your fist in the air to celebrate, your foot blows and you’re suddenly airborne. Without time to adjust your body position, you land on the outside of your ankle and it rolls inward. You crumple to the floor in pain with a sprained ankle, an injury that’s all too common among climbers.

You may think that ankle sprains occur only with boulderers, but they’re also common with crack climbers and route climbers. With crack climbers, repetitively torqueing the foot into fissures can sprain the ligaments on the outside of the ankle. For route climbers, a large pendulum fall that forces your ankle to bend backward can sprain the syndesmosis across the front of the joint. Oftentimes, there will be bruising, tenderness and an inability to bear weight after the injury. You will likely have decreased range of motion and feelings of instability.
However, there’s hope! You can ward against ankle sprains by learning to land properly as well as by performing this targeted exercise to strengthen the muscles and tendons that protect the joint.
Movement Tip: Landing From a Boulder Problem
When falling from a bouldering problem, our ankles—usually the first major joint to come into contact with the ground, thus bearing the brunt of the fall—are susceptible to injury. Good landing mechanics are critical to prevent a sprain. First of all, avoid landing on the outside of your foot to decrease the chance of spraining your ankle—keep your feet aligned with your lower leg, not rolling outward. Second, know that proper landing technique includes absorbing shock equally through your ankles, knees, and hips—but don’t always try to stick the landing. Instead, let momentum carry you to the ground. Bring your arms in toward your chest, lower your chin, and tuck and roll. This way you dissipate your fall’s energy more gradually and dynamically, instead of abruptly smacking the ground.
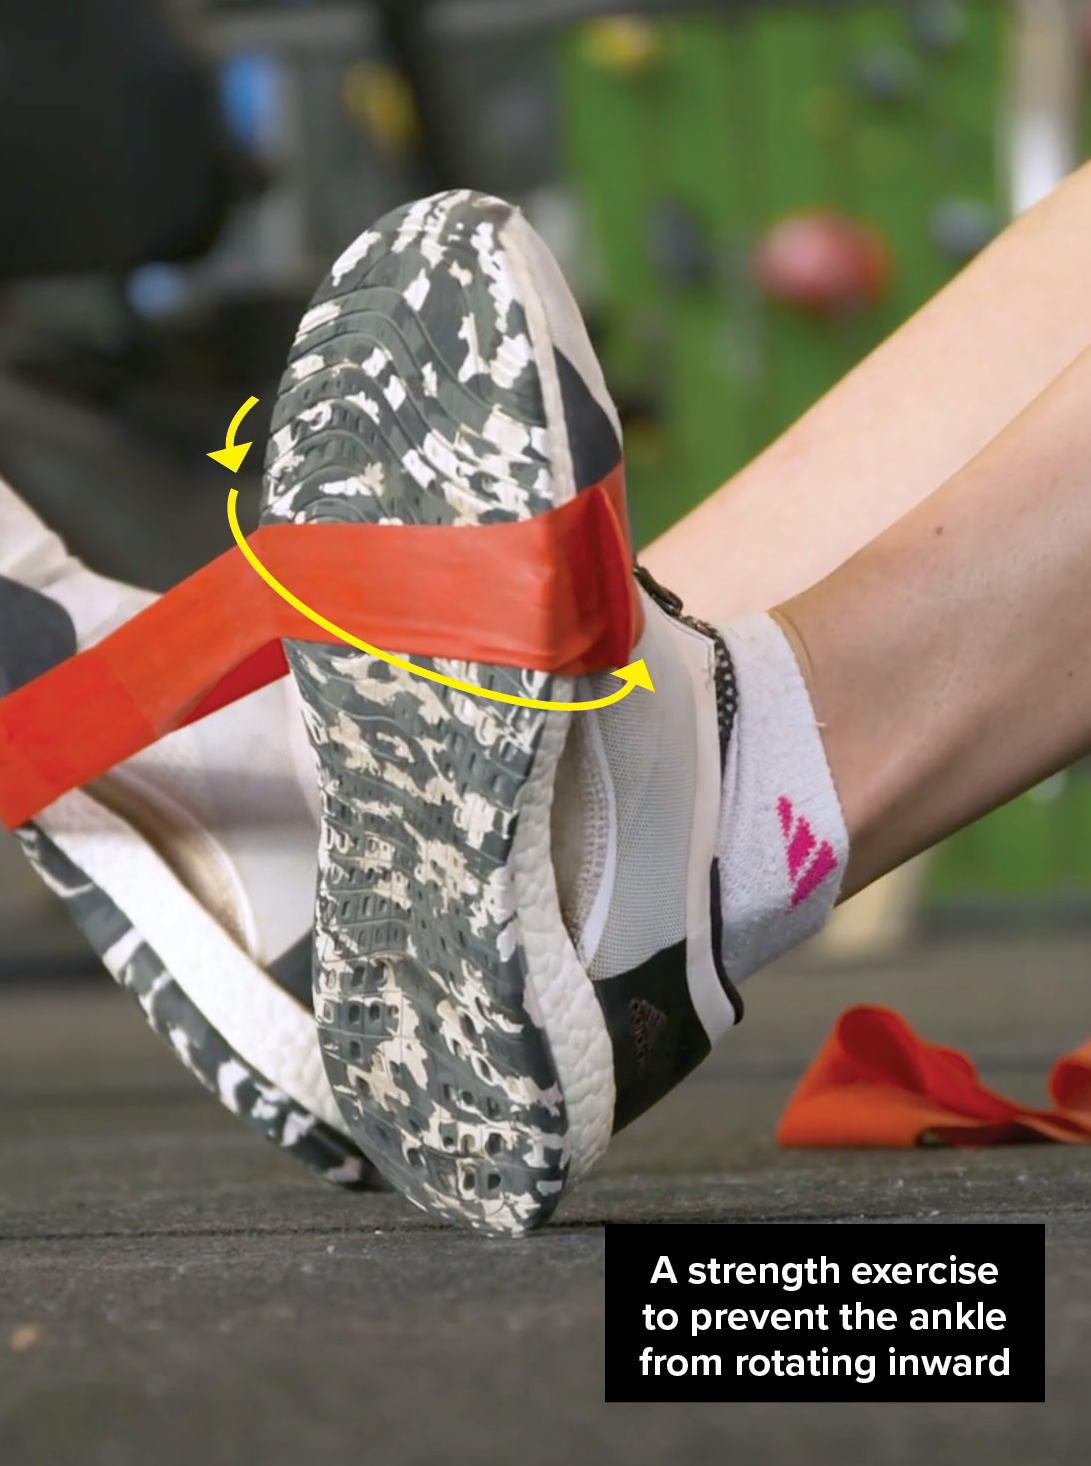
Recommended Exercise: Resisted Ankle Eversions
Perform the exercise above to strengthen the muscles and tendons that provide ankle stability. This will help protect your ankles in lead-climbing or bouldering falls. This exercise can also improve the dynamic stability of your ankles and help with balance when climbing.

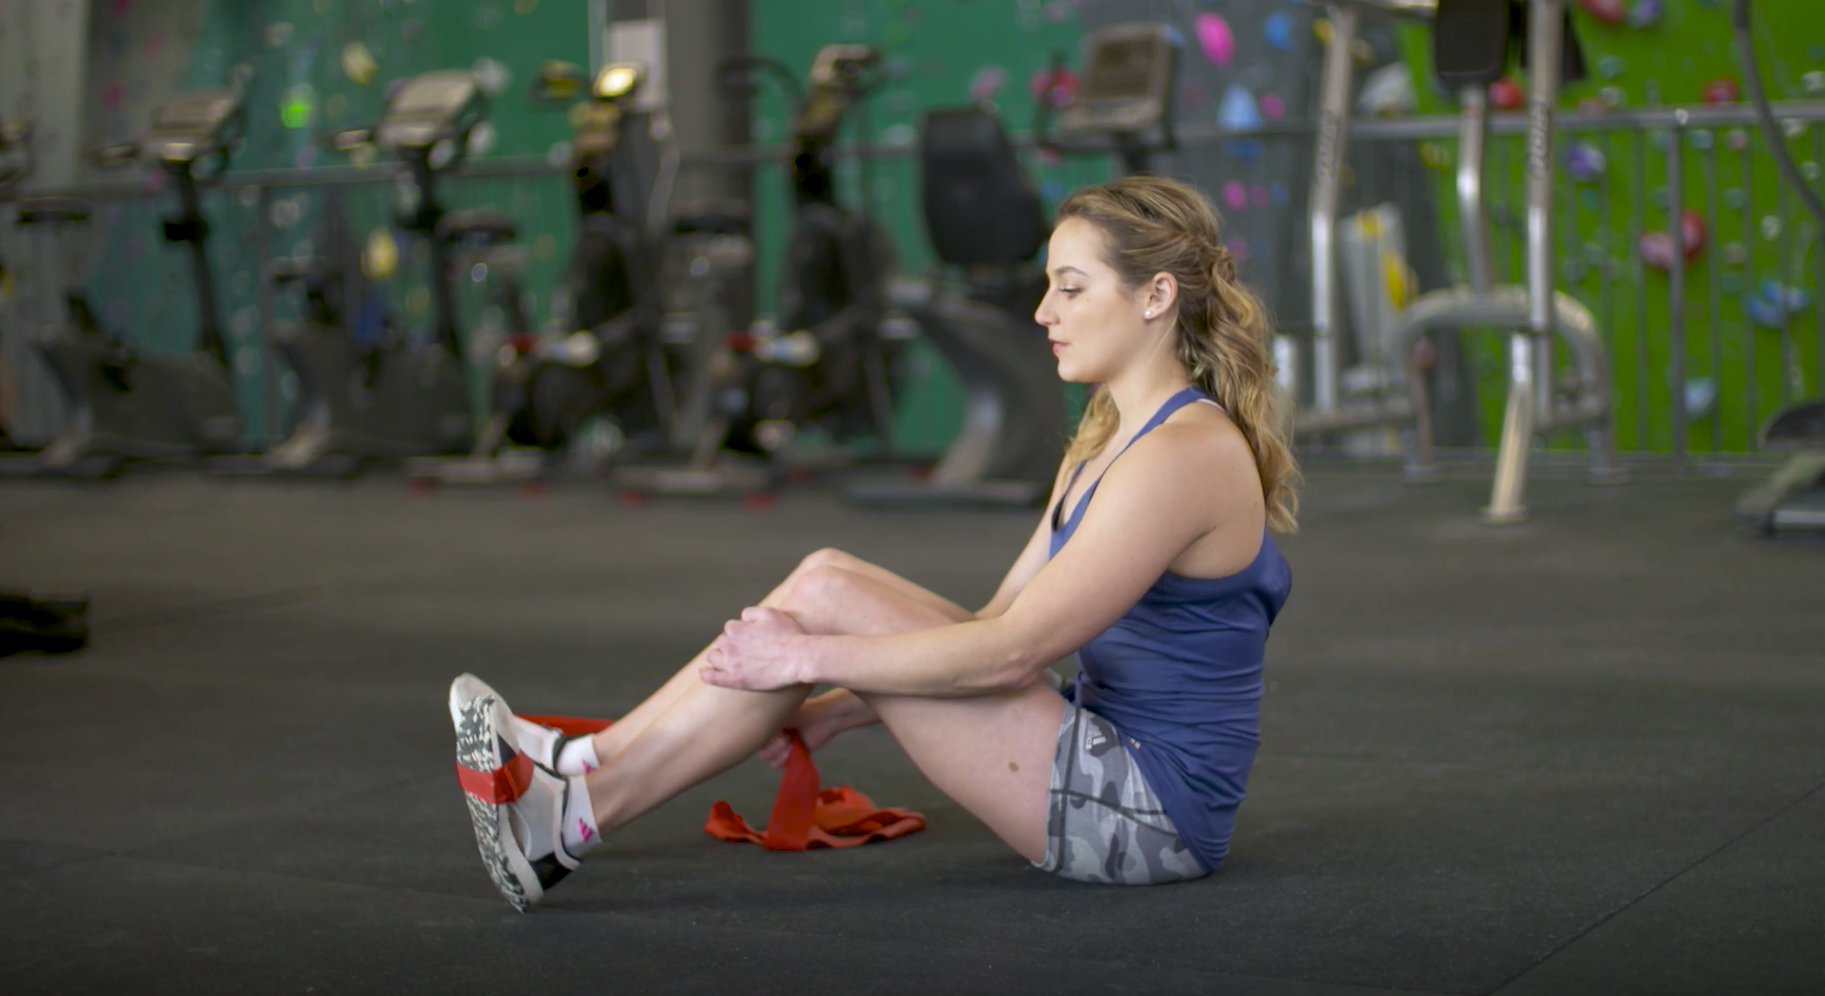
- Start seated with your knees bent in front of you and your toes pointed toward the ceiling.
- Wrap the resistance band around your left foot, and then use your right foot and hand to stabilize the band so that the line of pull is toward your left big toe.
- While holding the band with your right hand and using your opposite foot to stabilize it, rotate your left foot away from your body.
Frequency
3 sets of 15 repetitions on each side.
Tip
You can switch off between sides to maximize your time.
Props
6 feet of resistance band.
Dirtbag Substitution
If you don’t have access to a TheraBand, use 4 feet of nylon webbing or a double-length runner.
For more injury-prevention tips like this one, take Dr. Vagy and Climbing Magazine’s new 8-week AIM Adventure U course Strength Training for Injury Prevention. You’ll learn how to avoid common climbing injuries by strengthening your shoulders, wrists, fingers, hips, knees, ankles, and abs. With the help of pro climber Sasha DiGiulian, Climbing Magazine and Dr. Vagy take you through world-class warmups, workouts, and techniques to strengthen your upper body, lower body, and core. Best of all, this 8-week course only costs $125, and you can take it over and over again.
Strains, sprains and other injuries are common among climbers, but they don’t have to be. Sign up for Strength Training For Injury Prevention with Dr. Jared Vagy and you’ll learn the proper way to train, and be on your way to injury-free climbing